From Leaking Secrets to Full Automation: Managing Secrets with Vault in Kubernetes
Do you still store API keys or passwords directly in your Kubernetes manifests?
It’s a common practice — but a risky one. Secrets often end up exposed in Git, their rotation is rarely automated, and access tracking quickly becomes hard to manage. In production, a single leak can compromise a service — or even your entire environment.
To solve this problem, HashiCorp Vault provides a centralized and secure way to manage secrets: built-in encryption, fine-grained access control through policies, and automatic credential rotation. When paired with the Vault Secrets Operator, it integrates seamlessly with Kubernetes. The operator synchronizes secrets from Vault into native Kubernetes Secret objects — so applications keep consuming them as usual, while the underlying management becomes secure, auditable, and dynamic.
In this hands-on guide, we’ll deploy Vault and the Vault Secrets Operator on a local cluster, store a secret in Vault, and then consume it from Kubernetes — starting with a static secret, and then moving to a dynamic one automatically generated by Vault.
You can find all the manifests and configuration files used in this guide on GitHub
Table of Contents
- Before you begin
- Deploying Vault on Kubernetes
- Installing the Vault Secrets Operator
- Syncing a Secret from Vault to Kubernetes
- Dynamic Secrets: Automated Generation and Rotation
- Conclusion
Before you begin
This guide uses a GitOps workflow powered by FluxCD, similar to the setup in my homelab. It allows you to keep a clean, readable, and version-controlled repository, where every cluster component is defined declaratively. Flux continuously applies and reconciles this desired state, eliminating the need for repetitive manual commands.
If you prefer not to use Flux, you can simply run the equivalent commands with Helm and kubectl. The behavior remains exactly the same — only the deployment method changes.
All the manifests used throughout this guide are available in the accompanying repository, which you can explore to follow along or reuse in your own setup.
Deploying Vault on Kubernetes
Installing Vault on Kubernetes is done through the official HashiCorp Helm chart, which is the recommended method to achieve a reliable and maintainable setup.
It’s also a good practice to isolate Vault in its own namespace, ensuring its resources remain clearly separated from the rest of the cluster.
Deploy Vault with Helm
We can now add the official Helm chart to our configuration:
apiVersion: source.toolkit.fluxcd.io/v1
kind: HelmRepository
metadata:
  name: vault
  namespace: vault
spec:
  interval: 24h
  url: https://helm.releases.hashicorp.com
Once the chart is referenced, we can install Vault in high-availability mode using Raft integrated storage, with TLS enabled and the web UI available for administration.
apiVersion: helm.toolkit.fluxcd.io/v2
kind: HelmRelease
metadata:
  name: vault
  namespace: vault
spec:
  interval: 30m
  chart:
    spec:
      chart: "vault"
      version: "0.30.0"
      sourceRef:
        kind: HelmRepository
        name: vault
        namespace: vault
      interval: 12h
  install:
    crds: Create
  upgrade:
    crds: CreateReplace
  values:
    injector:
      enabled: false
    server:
      affinity: ""
      ha:
        enabled: true
        replicas: 5
        raft:
          enabled: true
          setNodeId: true
          config: |
              cluster_name = "vault-integrated-storage"
              storage "raft" {
                path    = "/vault/data/"
              }
              listener "tcp" {
                address = "[::]:8200"
                cluster_address = "[::]:8201"
                tls_disable = "true"
              }

              service_registration "kubernetes" {}
After the manifests are applied, Flux automatically deploys Vault into its dedicated namespace. The pods reach the Running state — however, Vault remains sealed: the instance is up, but still unusable until it’s manually unsealed using the keys generated during initialization.
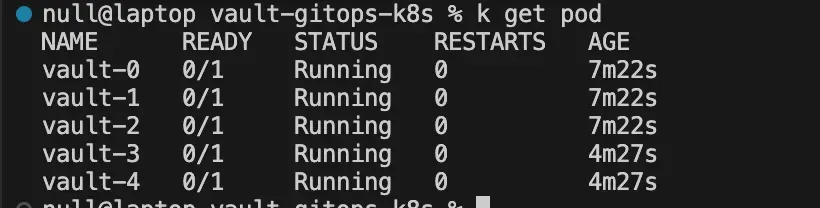
Initialize and Unseal Vault
To initialize Vault, open a shell inside the main container so you can interact directly with the Vault CLI:
kubectl exec -it vault-0 -n vault -- /bin/shOnce inside the container, start the initialization process:
vault operator init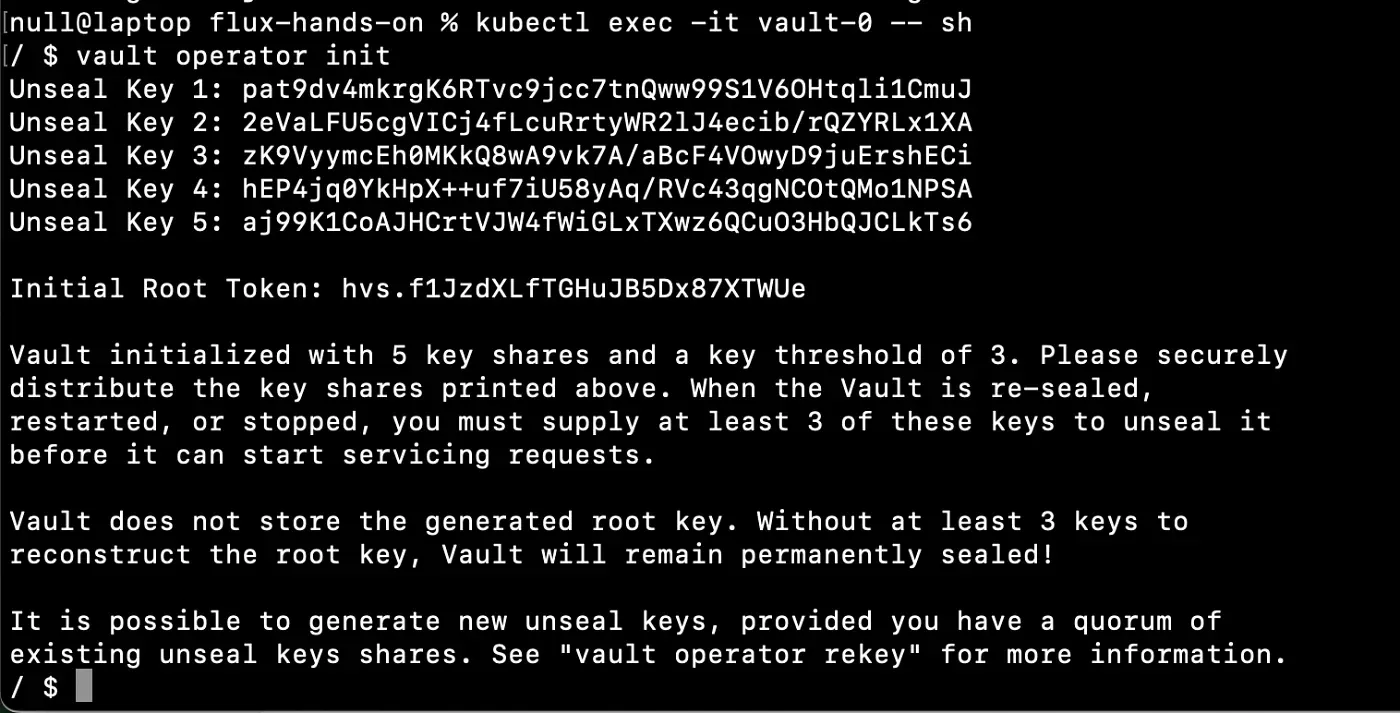
This command generates several unseal keys and a root token. By default, Vault uses a key-sharing mechanism: a specific number of keys (typically 3 out of 5) are required to unseal the cluster. Be sure to store these keys and the root token in a secure location — never in Git or any shared repository.
You can now unseal Vault, starting with the main node:
vault operator unsealIf you run into a connection error while entering the unseal token, set the Vault address explicitly to the service DNS:
export VAULT_ADDR=http://vault.vault.svc.cluster.local:8200Repeat the command on the other pods until the entire cluster is fully unsealed and operational.
Before configuring anything in Vault, you first need to authenticate using the root token that was generated during initialization. This token grants full administrative access, allowing you to enable secret engines, create policies, and set up authentication methods.
vault login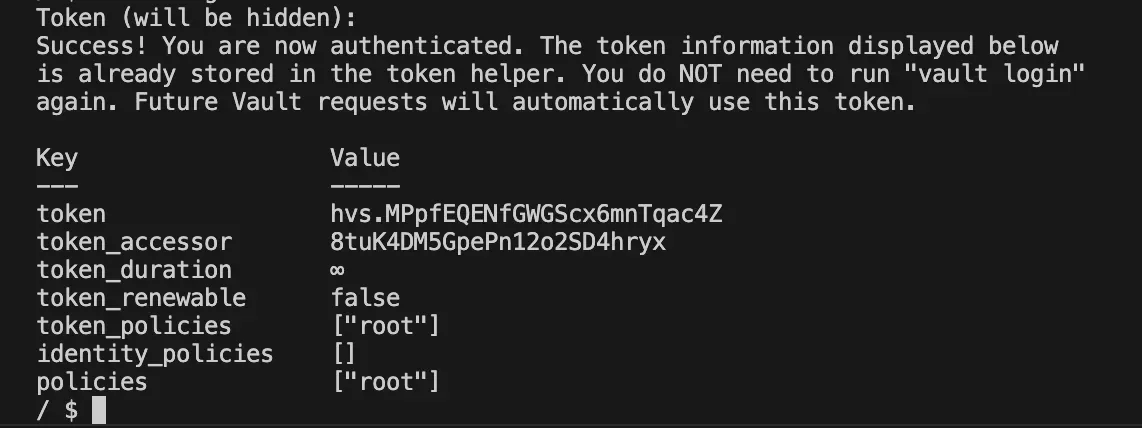
Enable Kubernetes Auth and KV v2 Secrets Engine
Once Vault is initialized and unsealed, we can start configuring its core components. We’ll begin by enabling the Kubernetes authentication method and the KV v2 secrets engine.
Enable Kubernetes authentication: This method allows Vault to verify requests coming from Kubernetes ServiceAccounts.
vault auth enable -path kubernetes kubernetes
vault write auth/kubernetes/config \
kubernetes_host="https://$KUBERNETES_PORT_443_TCP_ADDR:443"
Enable the KV v2 secrets engine: This engine is used to store and manage static key-value secrets with built-in versioning.
vault secrets enable -path=kvv2 kv-v2Installing the Vault Secrets Operator
Setting up the Vault Secrets Operator (VSO) is just as straightforward as deploying Vault itself. You simply add the official HashiCorp Helm chart to your configuration, then deploy the operator with a HelmRelease.
Deploy Vault with Helm
We can now add the official Helm chart to our configuration:
apiVersion: source.toolkit.fluxcd.io/v1
kind: HelmRepository
metadata:
  name: hashicorp
  namespace: vault-secrets-operator
spec:
  interval: 24h
  url: https://helm.releases.hashicorp.com
This HelmRelease installs the operator in its own namespace and defines a default connection to Vault. It specifies the Vault server address and the Kubernetes role that the operator will use to authenticate.
apiVersion: helm.toolkit.fluxcd.io/v2
kind: HelmRelease
metadata:
  name: vault-secrets-operator
  namespace: vault-secrets-operator
spec:
  interval: 30m
  chart:
    spec:
      chart: "vault-secrets-operator"
      version: "0.10.0"
      sourceRef:
        kind: HelmRepository
        name: hashicorp
        namespace: vault-secrets-operator
      interval: 12h
  install:
    crds: Create
  upgrade:
    crds: CreateReplace
    force: true
  values:
    defaultVaultConnection:
      enabled: true
      address: "http://vault.vault.svc.cluster.local:8200"
      skipTLSVerify: true
    controller:
      manager:
        clientCache:
          persistenceModel: direct-encrypted
          storageEncryption:
            enabled: true
            mount: kubernetes
            keyName: vso-client-cache
            transitMount: demo-transit
            kubernetes:
              role: auth-role-operator
              serviceAccount: vault-secrets-operator-controller-manager
              tokenAudiences: ["vault"]
The configuration also enables the encrypted client cache — a feature that lets the operator securely store its Vault tokens locally. If the controller pod restarts, it can immediately resume syncing secrets without needing to re-authenticate, ensuring smooth and uninterrupted operation.
Behind the scenes, this caching mechanism relies on Vault’s Transit secrets engine, which handles encryption and decryption of the stored tokens. The key referenced in the HelmRelease (vso-client-cache) will be created in the next step.
Preparing the Transit Engine for the VSO Cache
For this encrypted caching mechanism to work, Vault needs an active Transit engine and a matching encryption key (vso-client-cache) defined in the HelmRelease.
We’ll now enable the Transit engine, create the key, and define a policy that allows the VSO controller to encrypt and decrypt its tokens securely.
Enable the Transit engine
vault secrets enable -path=demo-transit transitCreate the encryption key
vault write -force demo-transit/keys/vso-client-cacheDefine a policy that allows encryption and decryption
vault policy write demo-auth-policy-operator - <<EOF
path "demo-transit/encrypt/vso-client-cache" {
  capabilities = ["create", "update"]
}
path "demo-transit/decrypt/vso-client-cache" {
  capabilities = ["create", "update"]
}
EOF
Create the Kubernetes role
vault write auth/kubernetes/role/auth-role-operator \
  bound_service_account_names=vault-secrets-operator-controller-manager \
  bound_service_account_namespaces=vault-secrets-operator \
  token_ttl=0 \
  token_period=120 \
  token_policies=demo-auth-policy-operator \
  audience=vault
This role allows the Vault Secrets Operator to authenticate via Kubernetes and use the Transit engine to encrypt its local cache.
Before the operator can start synchronizing secrets, we still need to create the corresponding connection on the Kubernetes side. This step defines how the operator authenticates with Vault — using its ServiceAccount and the role we just configured.
apiVersion: v1
kind: ServiceAccount
metadata:
  namespace: vault-secrets-operator
  name: vault-secrets-operator-controller-manager

---
apiVersion: secrets.hashicorp.com/v1beta1
kind: VaultAuth
metadata:
  name: operator-auth
  namespace: vault-secrets-operator
spec:
  method: kubernetes
  mount: kubernetes
  vaultConnectionRef: default
  kubernetes:
    role: auth-role-operator
    serviceAccount: vault-secrets-operator-controller-manager
    audiences:
      - vault
  storageEncryption:
    mount: demo-transit
    keyName: vso-client-cache
This VaultAuth resource links the operator’s ServiceAccount to the Vault role, completing the authentication flow.
Once the role and policy are applied, the operator pods should be Running and ready to start synchronizing secrets between Vault and Kubernetes.

Syncing a Secret from Vault to Kubernetes
Now that Vault and the Vault Secrets Operator (VSO) are up and running, let’s connect everything together and synchronize a real secret from Vault into Kubernetes.
Define an Access Policy
Policies in Vault define which paths can be accessed and what actions are allowed (read, list, write, etc.) for a given role or ServiceAccount.
vault policy write webapp - <<EOF
path "kvv2/data/webapp/config" {
  capabilities = ["read", "list"]
}
EOF
Create a Kubernetes Auth Role:
Next, create a Kubernetes authentication role that binds this policy to a specific ServiceAccount in your application namespace (app). This allows Vault to authenticate workloads in that namespace and issue tokens with the webapp policy.
vault write auth/kubernetes/role/role1 \
  bound_service_account_names=demo-app \
  bound_service_account_namespaces=app \
  policies=webapp \
  audience=vault \
  ttl=24h
Add a Test Secret
Let’s create a sample static secret inside Vault’s KV engine to verify the setup.
vault kv put kvv2/webapp/config username="static-user" password="static-password"At this point, the trust relationship between Vault and Kubernetes is established: Vault can authenticate workloads through their ServiceAccounts. The Vault Secrets Operator can now retrieve and sync these secrets into Kubernetes.
We’ll use the webapp policy and its associated role in the next step to automatically inject this secret into the cluster.
Configure Kubernetes Authentication
The application will use a dedicated ServiceAccount. Create a VaultAuth resource that links this ServiceAccount to the Vault role (role1) created earlier.
apiVersion: v1
kind: ServiceAccount
metadata:
  namespace: vault-secrets-operator
  name: vault-secrets-operator-controller-manager

---
apiVersion: secrets.hashicorp.com/v1beta1
kind: VaultAuth
metadata:
  name: operator-auth
  namespace: vault-secrets-operator
spec:
  method: kubernetes
  mount: kubernetes
  vaultConnectionRef: default
  kubernetes:
    role: auth-role-operator
    serviceAccount: vault-secrets-operator-controller-manager
    audiences:
      - vault
  storageEncryption:
    mount: demo-transit
    keyName: vso-client-cache
This resource tells the VSO how the application should authenticate with Vault.
Define the Secret to Sync
Next, create a VaultStaticSecret that specifies which secret to fetch from Vault, where to store it in Kubernetes, and which VaultAuth to use.
apiVersion: secrets.hashicorp.com/v1beta1
kind: VaultStaticSecret
metadata:
  name: app-static-secret
  namespace: app
spec:
  type: kv-v2
  mount: kvv2
  path: webapp/config
  destination:
    name: app-kvv2-secret
    create: true
  refreshAfter: 10s
  vaultAuthRef: demo-app-auth
This manifest includes parameters like:
- path: the secret location in Vault (webapp/config), destination.name: the name of the resulting Kubernetes Secret,
- vaultAuthRef: the reference to the VaultAuth object,
- refreshAfter: how often the operator checks for updates.
Verify the Synchronization Once the manifests are applied, the VSO retrieves the secret from Vault and creates the corresponding Kubernetes Secret in the app namespace. You should see your new secret listed.

Test Live Updates
To confirm live synchronization, update the secret in Vault:
kubectl exec -it vault-0 -n vault - /bin/sh vault kv put kvv2/webapp/config username="static-user-2" password="updated-password"After a few seconds (depending on refreshAfter), the secret in Kubernetes automatically updates — no manual intervention required.

Dynamic Secrets: Automated Generation and Rotation
Static secrets remain valid until manually changed — the longer they live, the greater the risk they pose. With dynamic secrets, Vault generates unique, short-lived credentials on demand and automatically revokes them when they expire. This completely removes the need for manual password management and significantly strengthens security.
In this section, we’ll illustrate the concept using a PostgreSQL database. While deploying PostgreSQL itself isn’t the focus of this guide, you can check the corresponding files in the repository to see how it’s installed via Helm.
We’ll now enable Vault’s Database secrets engine and connect it to PostgreSQL, allowing Vault to generate dynamic, time-limited credentials automatically.
Enable the Database secrets engine
This engine allows Vault to handle user creation, rotation, and revocation for supported databases
vault secrets enable -path=demo-db databaseConfigure the PostgreSQL connection
This tells Vault where the database is and which initial credentials it can use to connect.
vault write demo-db/config/demo-db \
  plugin_name=postgresql-database-plugin \
  allowed_roles="dev-postgres" \
  connection_url="postgresql://{{username}}:{{password}}@postgresql.postgresql.svc.cluster.local:5432/postgres?sslmode=disable" \
  username="postgres" \
  password="secret-pass"
Create a role for temporary credentials
The role defines how long credentials remain valid and how they’re revoked when expired.
vault write demo-db/roles/dev-postgres \
  db_name=demo-db \
  creation_statements="CREATE ROLE \"{{name}}\" WITH LOGIN PASSWORD '{{password}}' VALID UNTIL '{{expiration}}'; GRANT ALL PRIVILEGES ON DATABASE postgres TO \"{{name}}\";" \
  revocation_statements="REVOKE ALL ON DATABASE postgres FROM \"{{name}}\";" \
  default_ttl="1m" \
  max_ttl="1m"
Create an access policy for the application
This policy allows the application to read the generated credentials.
vault policy write demo-auth-policy-db - <<EOF
path "demo-db/creds/dev-postgres" {
  capabilities = ["read"]
}
EOF
Configure Kubernetes Access for Dynamic Secrets
To allow the application to retrieve the temporary PostgreSQL credentials generated by Vault, we need to create a Kubernetes authentication role that links its ServiceAccount to the appropriate Vault policies.
vault write auth/kubernetes/role/auth-role \
  bound_service_account_names=demo-app \
  bound_service_account_namespaces=app \
  token_ttl=0 \
  token_period=120 \
  token_policies="webapp,demo-auth-policy-db"\
  audience=vault
This role tells Vault that the ServiceAccount demo-app in the app namespace is authorized to request temporary PostgreSQL credentials.
Notice that the token_policies field includes two policies:
- webapp: The policy we created earlier for the static secret
- demo-auth-policy-db: The policy allowing access to dynamic database credentials.
By combining both, we can reuse the same VaultAuth object for both static and dynamic secrets — simplifying configuration and avoiding duplication. The last step is to declare a VaultDynamicSecret that will automatically sync the generated PostgreSQL credentials into Kubernetes.
apiVersion: secrets.hashicorp.com/v1beta1
kind: VaultDynamicSecret
metadata:
  name: app-dynamic-secret
  namespace: app
spec:
  vaultAuthRef: demo-app-auth
  mount: demo-db
  path: creds/dev-postgres
  destination:
    create: true
    name: app-db-creds
Once the manifest is applied, the Vault Secrets Operator automatically retrieves the generated credentials, stores them in the app-db-creds Secret, and regenerates them on every rotation cycle.
Verify Automatic Rotation
To observe the rotation, open k9s in the app namespace and decode the app-db-creds secret to view its values:

Wait until the TTL defined in Vault expires (about one minute in this example), then refresh the view. You’ll see that new credentials have been automatically generated and synchronized.

Conclusion
With Vault and the Vault Secrets Operator, secret management in Kubernetes becomes both secure and effortless. Credentials are no longer stored in plain text, rotation happens automatically, and every access is governed by fine-grained policies. This integration strengthens security without adding operational overhead, fitting naturally into a GitOps and declarative workflow.