Deploy a Complete GitOps Workflow with FluxCD
If you’d like to explore all the manifests and configuration files used in this guide, check out the GitHub repository.
GitOps isn’t just a concept — it’s a faster, cleaner way to deploy while maintaining full control over your clusters. By declaring all infrastructure, applications, and policies in Git, you establish a single source of truth that your cluster continuously reconciles with, automatically correcting any drift. Backed by the CNCF, FluxCD turns every commit into a verifiable, consistent, and reversible deployment.
Table of Contents
- Set Up FluxCD on a kind Cluster
- Bootstrap Flux into the Cluster
- Deploy a Sample Application
- Modify and Observe Real-Time Sync
- Conclusion
Set Up FluxCD on a kind Cluster
In this section, we’ll install FluxCD on a local Kubernetes cluster with kind, connect it to a GitHub repository, and deploy a sample app using the GitOps approach. The goal is to see how Flux automates the deployment cycle — from commit to cluster synchronization.
Prerequisites
- Docker installed and running
- kubectl to interact with the cluster
- kind to create a local Kubernetes cluster
- Git configured locally
- A GitHub account with a personal access token that has
repopermissions - The Flux CLI installed on your machine
Make sure to export your GitHub variables GITHUB_USER and GITHUB_TOKEN, then create a local cluster with kind: kind create cluster — name flux-lab.
Bootstrap Flux into the Cluster
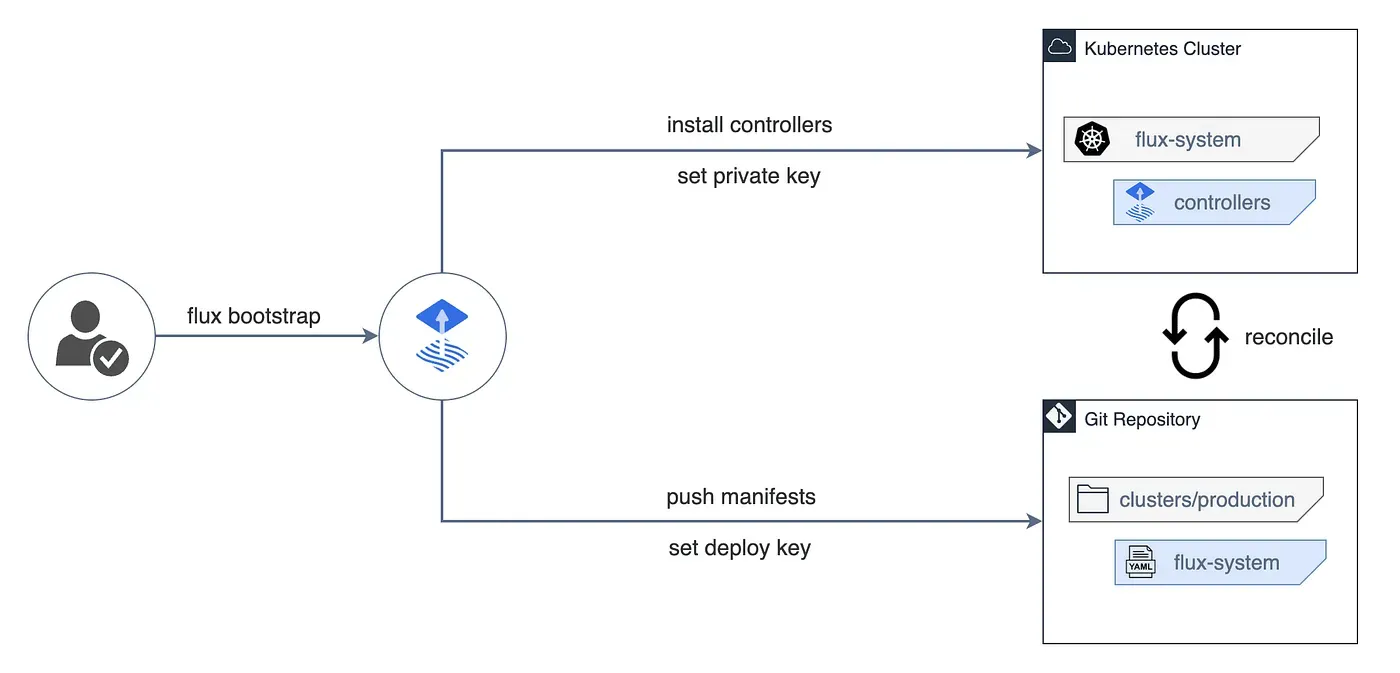
We’ll now install Flux in the cluster and connect it to a GitHub repository. This step initializes the GitOps workflow — the repository becomes the single source of truth, and the cluster continuously aligns itself with what’s defined in Git.
Run the following command to bootstrap Flux, create the GitHub repository, and configure continuous synchronization between your cluster and Git:
flux bootstrap github \
  --owner=$GITHUB_USER \
  --repository=flux-hands-on \
  --branch=main \
  --path=./clusters/my-cluster \
  --personal
This command creates a repository named flux-hands-on, adds all the manifests required for Flux to operate, and deploys the components to your cluster.
Once installation completes, you should see an output similar to this:
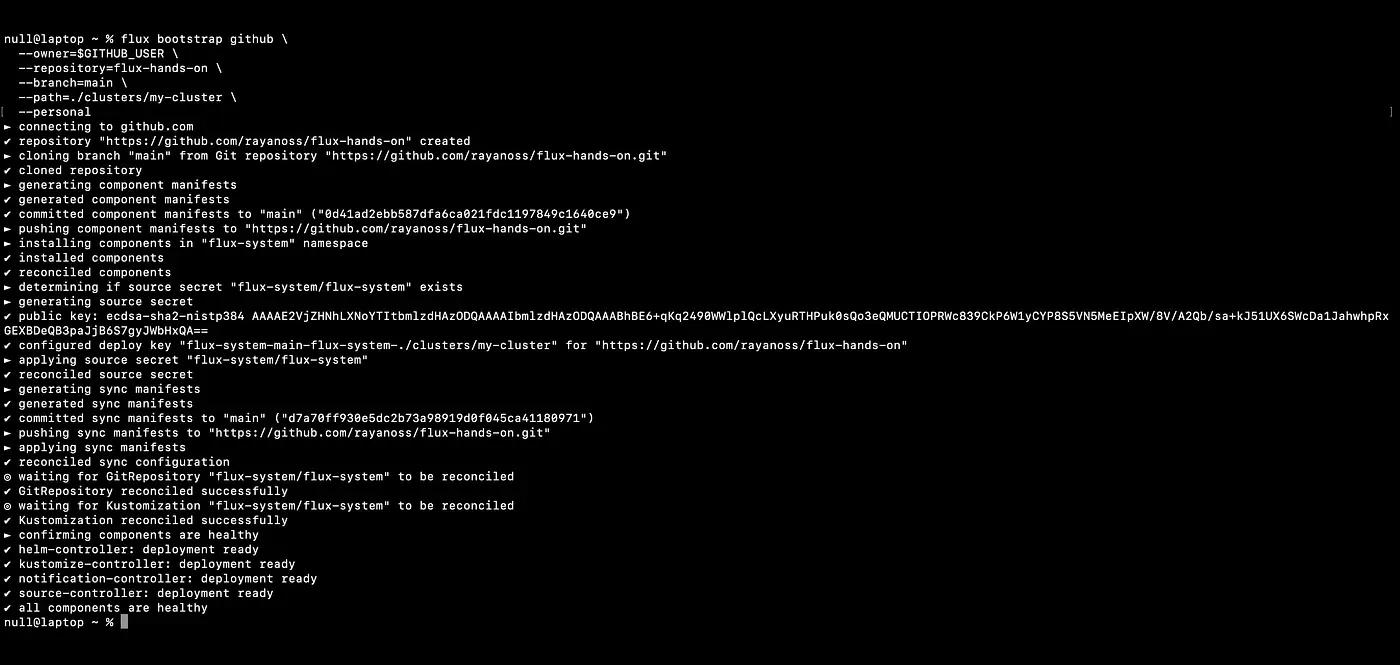
At this point, Flux is fully installed and connected to your GitHub repository. All configurations are versioned under clusters/my-cluster/.
Next, clone the repository locally so you can start adding your first resources:
git clone https://github.com/$GITHUB_USER/flux-hands-on
cd flux-hands-on
Deploy a Sample Application
To see Flux in action, we’ll deploy Podinfo, a small open-source web app commonly used in the Flux community for demos and testing.
In Flux, each configuration source — such as a Git repository — is defined as a Kubernetes resource. That’s the role of a GitRepository: it tells Flux where to fetch the manifests from. A Kustomization then defines how those manifests should be deployed and kept in sync with the cluster.
Run the following command to create the GitRepository that points to the Podinfo repo:
flux create source git podinfo \
  --url=https://github.com/stefanprodan/podinfo \
  --branch=master \
  --interval=1m \
  --export > ./clusters/my-cluster/podinfo-source.yaml
Then create the corresponding Kustomization to tell Flux how to deploy the repository’s content:
flux create kustomization podinfo \
  --target-namespace=default \
  --source=podinfo \
  --path="./kustomize" \
  --prune=true \
  --wait=true \
  --interval=30m \
  --export > ./clusters/my-cluster/podinfo-kustomization.yaml
Together, these two files define what to deploy (source) and how to deploy it (Kustomization).
Commit and push your changes to Git:
git add -A && git commit -m "Add podinfo GitRepository and Kustomization"
git push
Flux automatically detects the new files in the repository and applies the corresponding resources to the cluster.
To watch the reconciliation in real time, run:
flux get kustomizations --watchYou’ll see output like this as Flux continuously syncs your configurations:
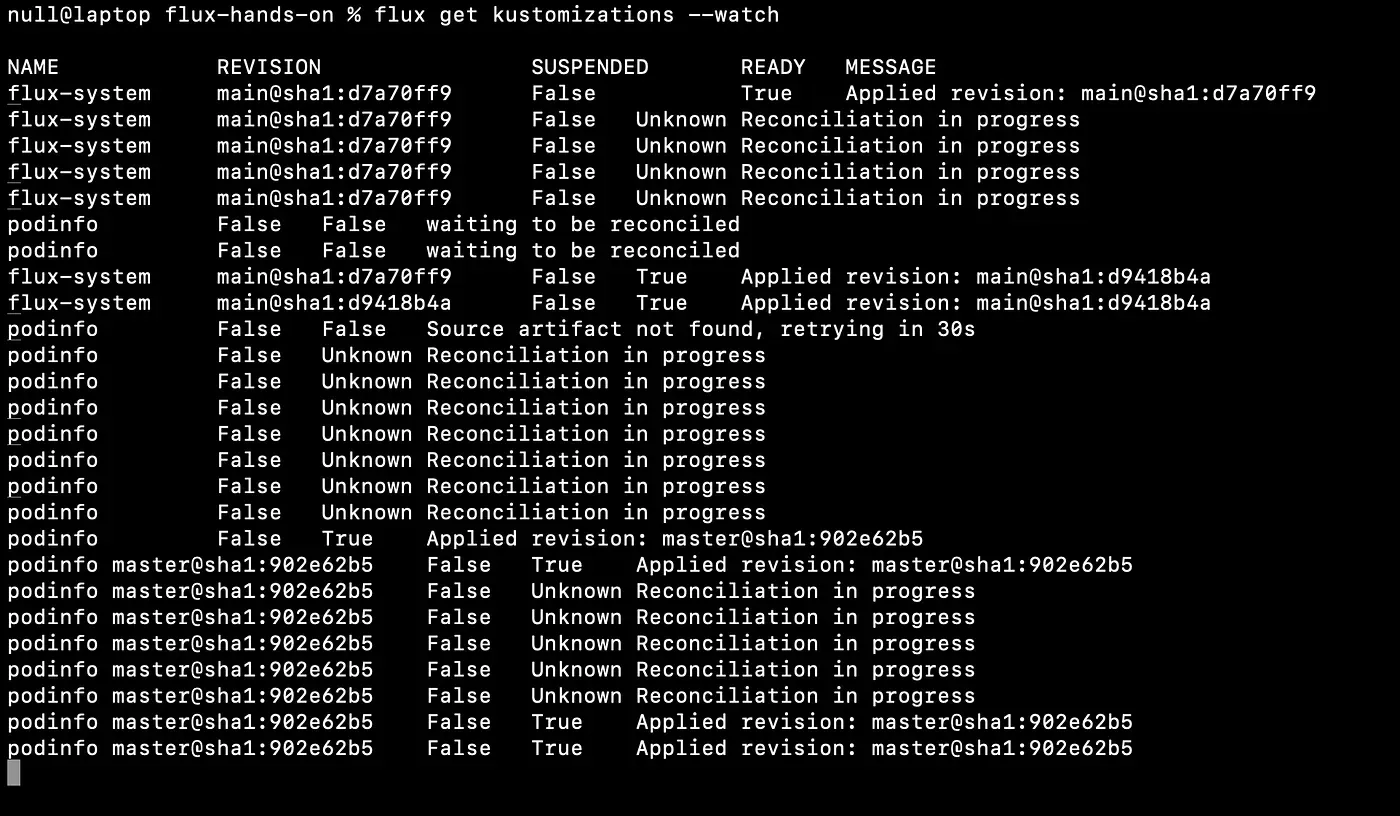
When the status shows “Applied revision”, it means Flux has successfully deployed the manifests from Git to your cluster.
You can verify that the application is running by checking the deployments and services in the default namespace:
kubectl -n default get deployments,servicesYou should see the podinfo deployment up and running:
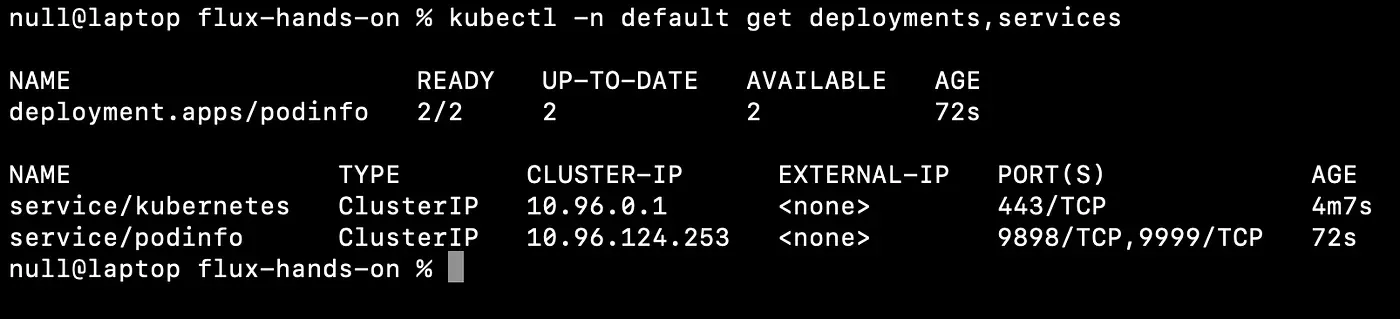
From now on, any change committed to the Podinfo repository will automatically sync to your Kubernetes cluster — no manual deployment required.
Modify and Observe Real-Time Sync
Let’s make a change to see Flux in action — increase the number of replicas for Podinfo. Flux will handle it automatically as soon as the change is committed to Git.
patches:
  - patch: |-
      apiVersion: autoscaling/v2
      kind: HorizontalPodAutoscaler
      metadata:
        name: podinfo
      spec:
        minReplicas: 3
    target:
      name: podinfo
      kind: HorizontalPodAutoscaler
Commit and push the change:
git add -A && git commit -m "Increase Podinfo replicas to 3"
git push
As soon as you push, Flux detects the change and applies the new configuration to the cluster.
To follow the sync in real time:
flux get kustomizations --watchOnce the sync completes, verify that the new pods have been deployed:
kubectl get pods -n defaultYou should see three podinfo pods running, confirming that Flux automatically applied your Git changes to the cluster:
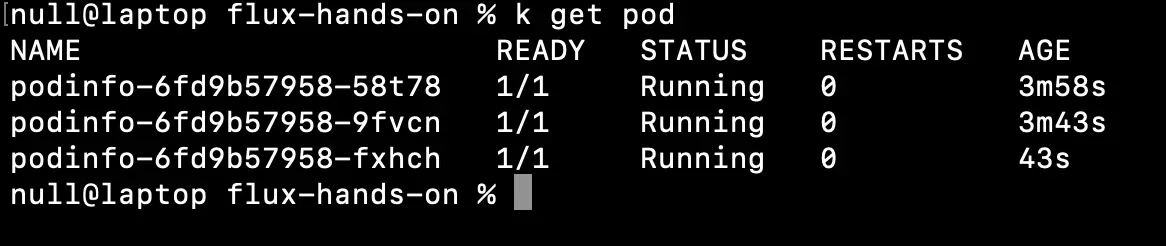
That’s the power of GitOps: your infrastructure and applications always reflect the desired state defined in Git. Any drift is corrected automatically, ensuring a stable and consistent environment.
Conclusion
You now have a complete GitOps environment powered by FluxCD — every change committed to Git is automatically applied to your cluster, ensuring consistency, traceability, and reliability.
If you’d like to see Flux in a more advanced setup — with security and observability built in — check out my Kubernetes homelab.